
Logging a borehole
Layers and soil descriptions
Add a layer for each change in the ground. The app builds the description sentence that prints on the log.
Open the borehole and choose the Layers tab. It says: "Each layer, with the sentence that prints on the log."
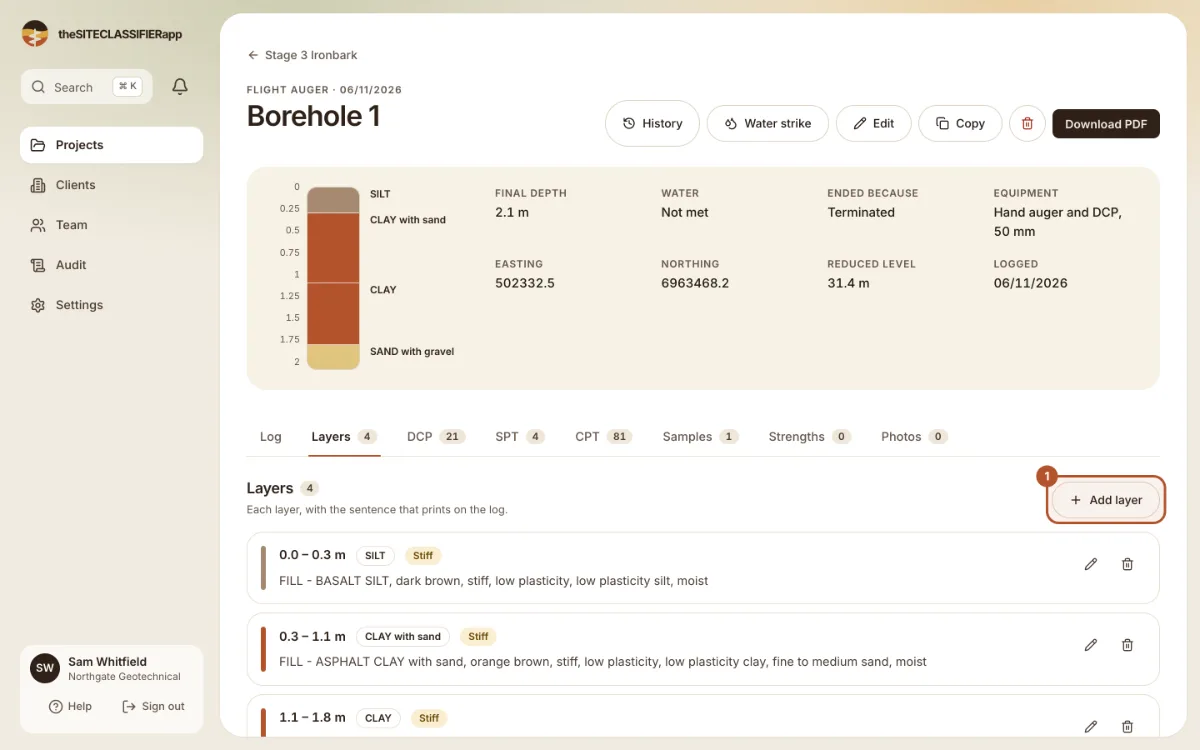
Press Add layer.
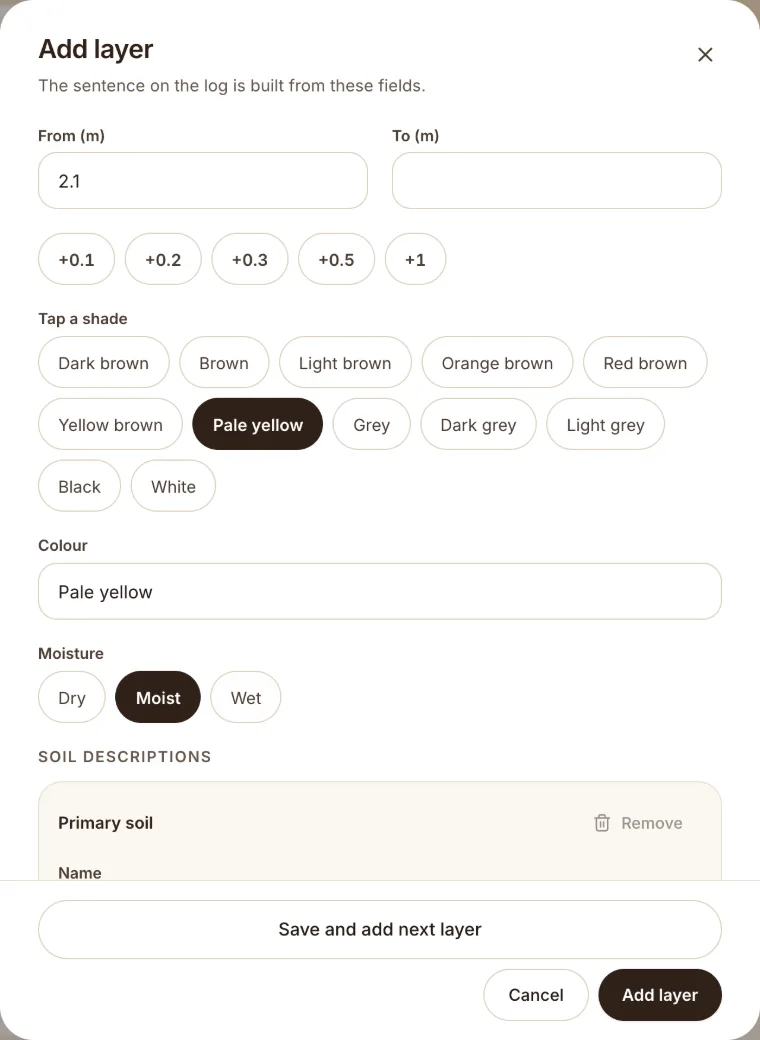
The layer
| Field | Notes |
|---|---|
| From (m) and To (m) | The depth range. To must be deeper than From. |
| Colour | Free text, for example "dark brown". |
| Origin | For example fill, topsoil or residual soil. See Colour, moisture, origin and graphic. |
| Moisture | Dry, moist or wet. |
| Drilling method | How you drilled this layer. |
| Graphic | Optional. The hatch on the log. |
The soil descriptions
A layer holds one or more soil descriptions. The first one is the main one. It gives the layer its name, for example CLAY or SAND. Each description has a Name. Then the form shows the questions that fit that soil:
- Fine soils (silt, clay): Plasticity, Consistency and Proportion.
- Coarse soils (sand, gravel): Particle size, Relative density and Proportion.
- Extra observations for anything else.
The app builds the sentence on the log from your answers, for example "ASPHALT CLAY with sand, orange brown, stiff, low plasticity, moist".
A layer keeps at least one description
You can add and remove descriptions. The remove button is switched off when only one description is left. Its hint says: "A layer needs at least one description."
Was this helpful?
Still stuck?
Tell us what happened. We will see which article you were reading.